LoneSomeSunday
Cherish Yesterday; Dream Tomorrow; Live Today.
Sunday, November 25, 2007
[Back to Photoshop Tutorials]
Smooth Skin 2
© LoneSomeSunday
There are several ways to do things, and this one is one of the other ways to smooth skin in Photoshop. But this is recommended to use for small pictures. :]
(** = click to see full size)
1. Open the picture you want.

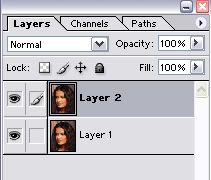
2. Duplicate the picture (or press Ctrl+J) and rename it Layer 1 and Layer 2.
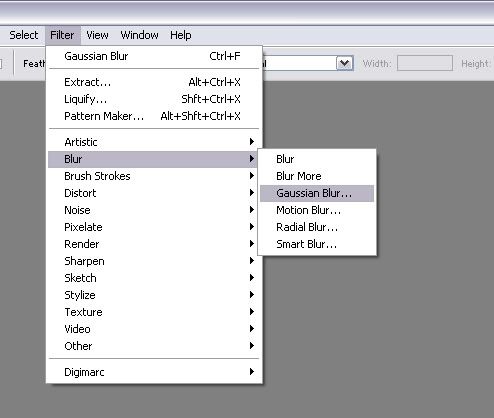
3. Then, go to Filter-->Blur-->Gaussian Blur... **
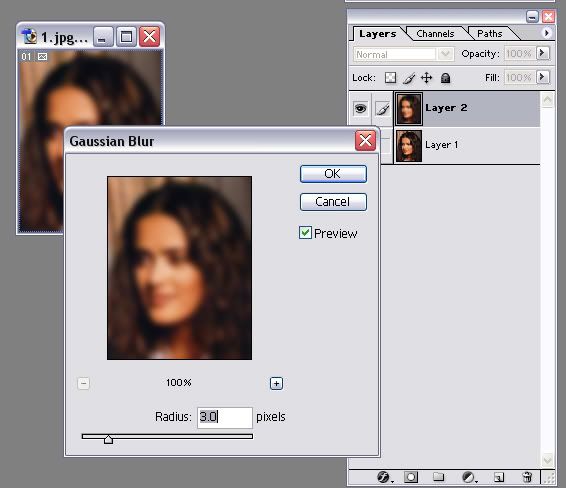
4. Choose the amount of pixels you want. Then click OK. **
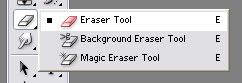
5. Go to the Eraser tool, or press E on the keyboard.
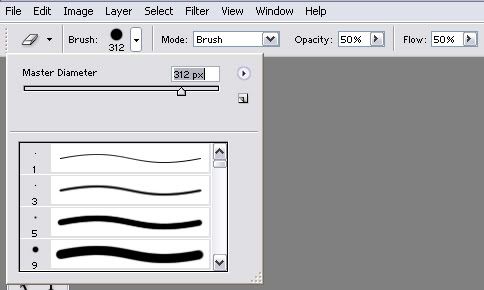
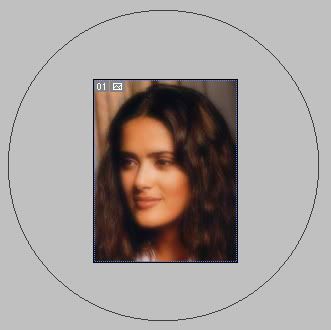
6. Make sure the Eraser is big enough to cover the whole picture, and set the Mode as Brush, also lower the Opacity to 50%. **
7. Click on the picture once or twice, or however you want.
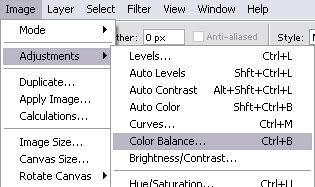
8. Then go to Image-->Adjustments-->Color Balance, or press Ctrl+B.
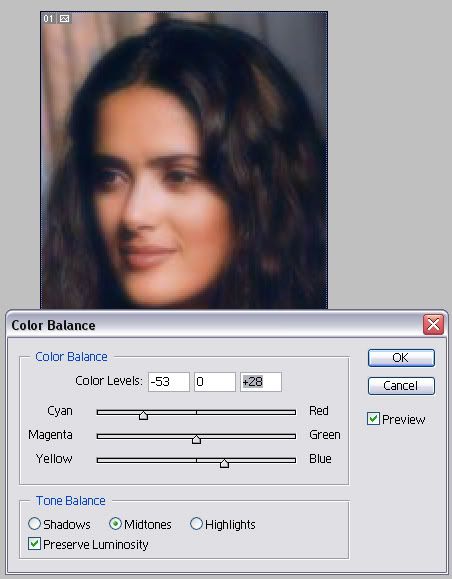
9. Move the arrows around until you get the color you want. **
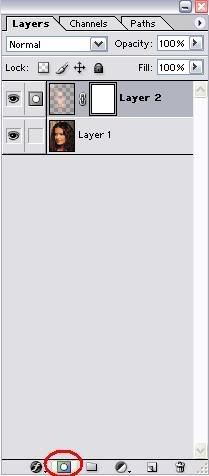
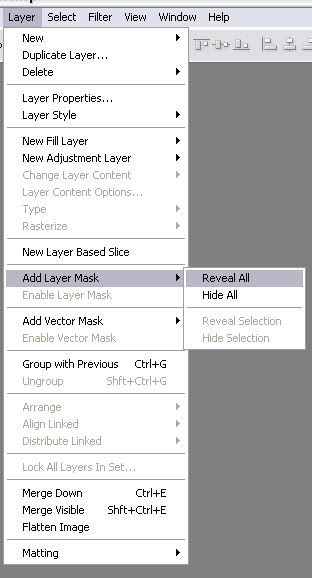
10. Then add layer mask, by click on the icon at the bottom, or go to Layer-->Add Layer Mask-->Reveal All
 **
**
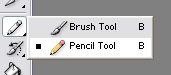
11. You can choose either Pencil tool or Brush tool, and make sure your color is black on top and white is underneath.
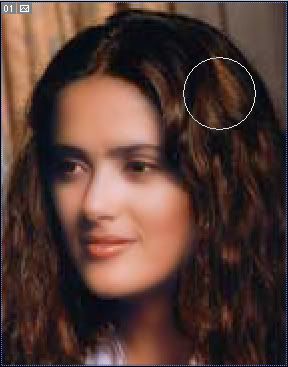
12. Then you start to paint the picture, but don't paint the skin. Remember to paint on the eyebrows, eyes, and the lips.
13. You can merge the layer, duplicate it, and repeat step 8->12 if you want to have better color.
Here's my result:

Hope this help. If you have any question, feel free to ask! ^_^
Designed & Coded by LoneSomeSunday
[http://lonesomesunday.blogspot.com/]
Code Template by Eka at Bad Obsession
[http://obsess.little-bombs.com/]
Pattern by Squidfingers
[http://squidfingers.com]
Smooth Skin 2
© LoneSomeSunday
There are several ways to do things, and this one is one of the other ways to smooth skin in Photoshop. But this is recommended to use for small pictures. :]
(** = click to see full size)
1. Open the picture you want.
2. Duplicate the picture (or press Ctrl+J) and rename it Layer 1 and Layer 2.
3. Then, go to Filter-->Blur-->Gaussian Blur... **
4. Choose the amount of pixels you want. Then click OK. **
5. Go to the Eraser tool, or press E on the keyboard.
6. Make sure the Eraser is big enough to cover the whole picture, and set the Mode as Brush, also lower the Opacity to 50%. **
7. Click on the picture once or twice, or however you want.
8. Then go to Image-->Adjustments-->Color Balance, or press Ctrl+B.
9. Move the arrows around until you get the color you want. **
10. Then add layer mask, by click on the icon at the bottom, or go to Layer-->Add Layer Mask-->Reveal All
**11. You can choose either Pencil tool or Brush tool, and make sure your color is black on top and white is underneath.
12. Then you start to paint the picture, but don't paint the skin. Remember to paint on the eyebrows, eyes, and the lips.
13. You can merge the layer, duplicate it, and repeat step 8->12 if you want to have better color.
Here's my result:
Hope this help. If you have any question, feel free to ask! ^_^
Labels: Tutorials
Posted by LoneSomeSunday at
9:20 AM
0 Comment(s)
Credits
Designed & Coded by LoneSomeSunday
[http://lonesomesunday.blogspot.com/]
Code Template by Eka at Bad Obsession
[http://obsess.little-bombs.com/]
Pattern by Squidfingers
[http://squidfingers.com]
